How to Point Your Name Server
What Is a Name Server?
A name server is part of the Domain Name System (DNS) that helps translate your domain name (like yourwebsite.com) into an IP address your web browser can understand. When you change hosting providers or set up your domain for the first time, you must point your name server to the correct host.
When Do You Need to Point Your Name Server
- Setting up a new website with a hosting provider
- Migrating to a new web host
- Connecting a domain registered at one provider to hosting at another
- Setting up services like email or custom applications that rely on specific DNS records
What You’ll Need Before You Start
- Access to your domain registrar account (e.g., GoDaddy, Namecheap, Google Domains)
- Your new name server addresses from your web hosting provider (usually look like ns1.hostingcompany.com, ns2.hostingcompany.com)
Steps to Point Your Name Serve

1. Log into Your Domain Registrar Account
Go to the website where your domain is registered and log in.
2. Navigate to Your Domain Settings
Find the section labeled Domains, My Domains, or something similar. Select the domain you want to update.
3. Locate DNS or Name Server Settings
In your domain dashboard, look for an option called DNS Management, Name Servers, or Custom DNS.
4. Enter the New Name Servers
Choose “Custom” or “Use Custom Name Servers” and enter the name servers provided by your hosting company. Usually, you’ll need to enter at least two.
Example:
- ns1.hostingprovider.com
- ns2.hostingprovider.com
5. Save Changes
Click Save, Update, or Apply—depending on your registrar’s layout.
Propagation Time
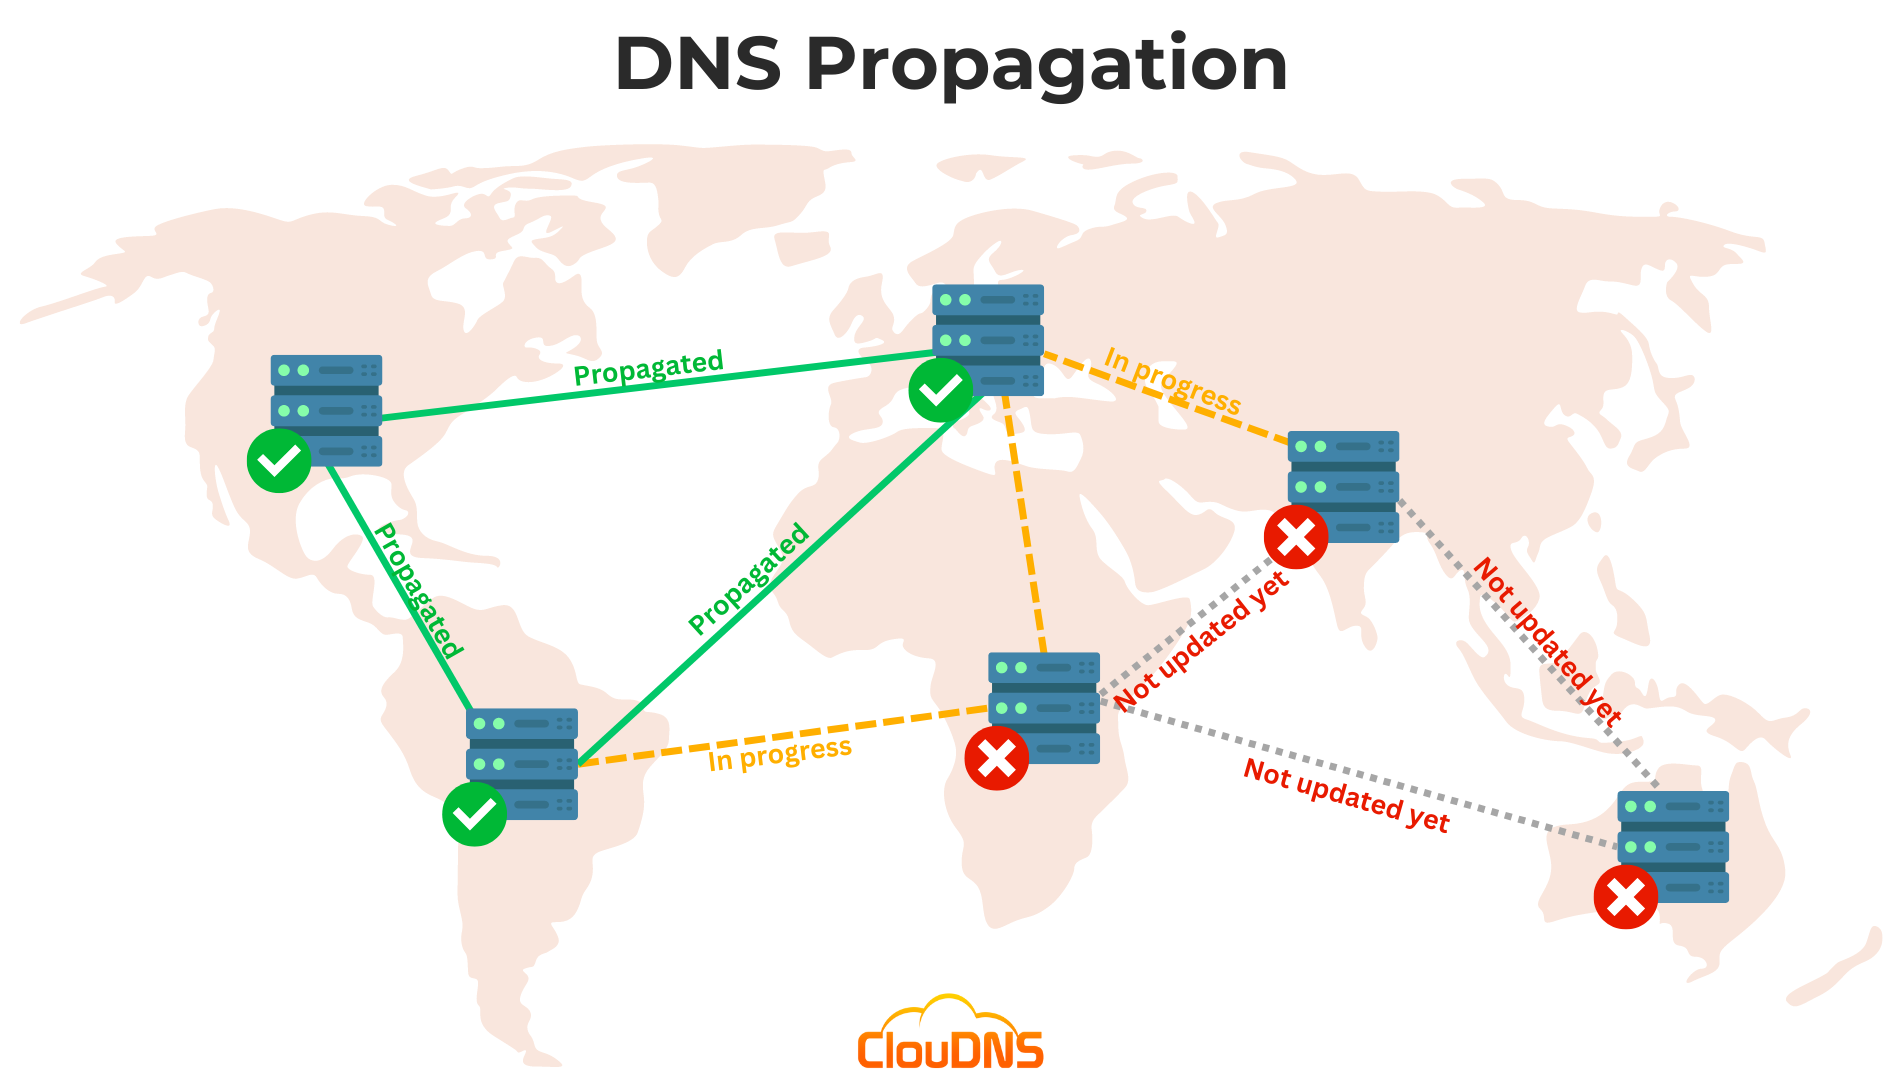
DNS changes can take a few minutes to 48 hours to propagate worldwide. During this time, your website might go offline temporarily or be accessible only in certain regions.
Tips for Smooth DNS Changes
- Do the update during low-traffic hours.
- Don’t delete your old hosting account until the change is complete.
- Use tools like whatsmydns.net to check propagation progress.
Conclusion
Pointing your name server is a key step in getting your website live and functional. While it may seem technical, the process is straightforward once you know where to look. With your DNS settings updated, your domain will correctly point to your new hosting provider, enabling your site to be accessible to the world.